Python-fu for The Gimp
I’ve been meaning to learn how to script The Gimp for a while now, but have never bothered to put the time aside to do it. Well, I finally did it, and this is why and how :)
The story:
When I had my 21st birthday, my brother made the party invites for me. He added a whole bunch of photos and I’ve still got a copy of that with all my photos as a keepsake.
Now his birthday is coming up and I thought I would repay the favour.
The Idea I had was to scan a bunch of old photos (like he did), then use The Gimp to make them look like printed photos (white border, drop shadow, kind of like polaroids) and scatter them around a “Happy Birthday” title.
I spent quite a while scanning the photos, adding them all as layers to a single canvas, resizing them to suit and then individually adding white padding, a black stroke around the outside, dropping a shadow, rotating and moving each individual layer to lay it out nicely, I was finally happy with the end result and saved a .xcf and then exported a .jpg.
At this stage I had all the scans, a font, a background image, the .xcf and the .jpg all saved in a folder on my desktop.
I quit The Gimp, got a flash drive and copied the .jpg over so I got get it printed, shutdown the pc and went for dinner.
When I got back quite some time later, my pc hadn’t quite shutdown yet, it just had a black screen.. So I left it a little longer and it still hadn’t shutdown, so I held down the power button to force it.
The next day, I got asked to make a small adjustment to the invite, and to my horror, I could not find the .xcf anywhere! I had the exported .jpg from the flash drive, but that wasn’t suitable to make the adjustment… something had happened and to this day I’m still not sure what, but I lost all my work… When I realised I had to redo all that work, that’s when I put time aside to learn how to script The Gimp!
Scripting The Gimp:
I took a look at some code examples for The Gimp’s script-fu functionality and having never learned Lisp, it looked pretty foreign to me! That’s when I noticed there was a Python-fu equivalent (luckily).
Using the Python Console from within Gimp is really easy!
It has a “Browse” button which brings up the “Python Procedure Browser” - which is a list of functions that interact with The Gimp.
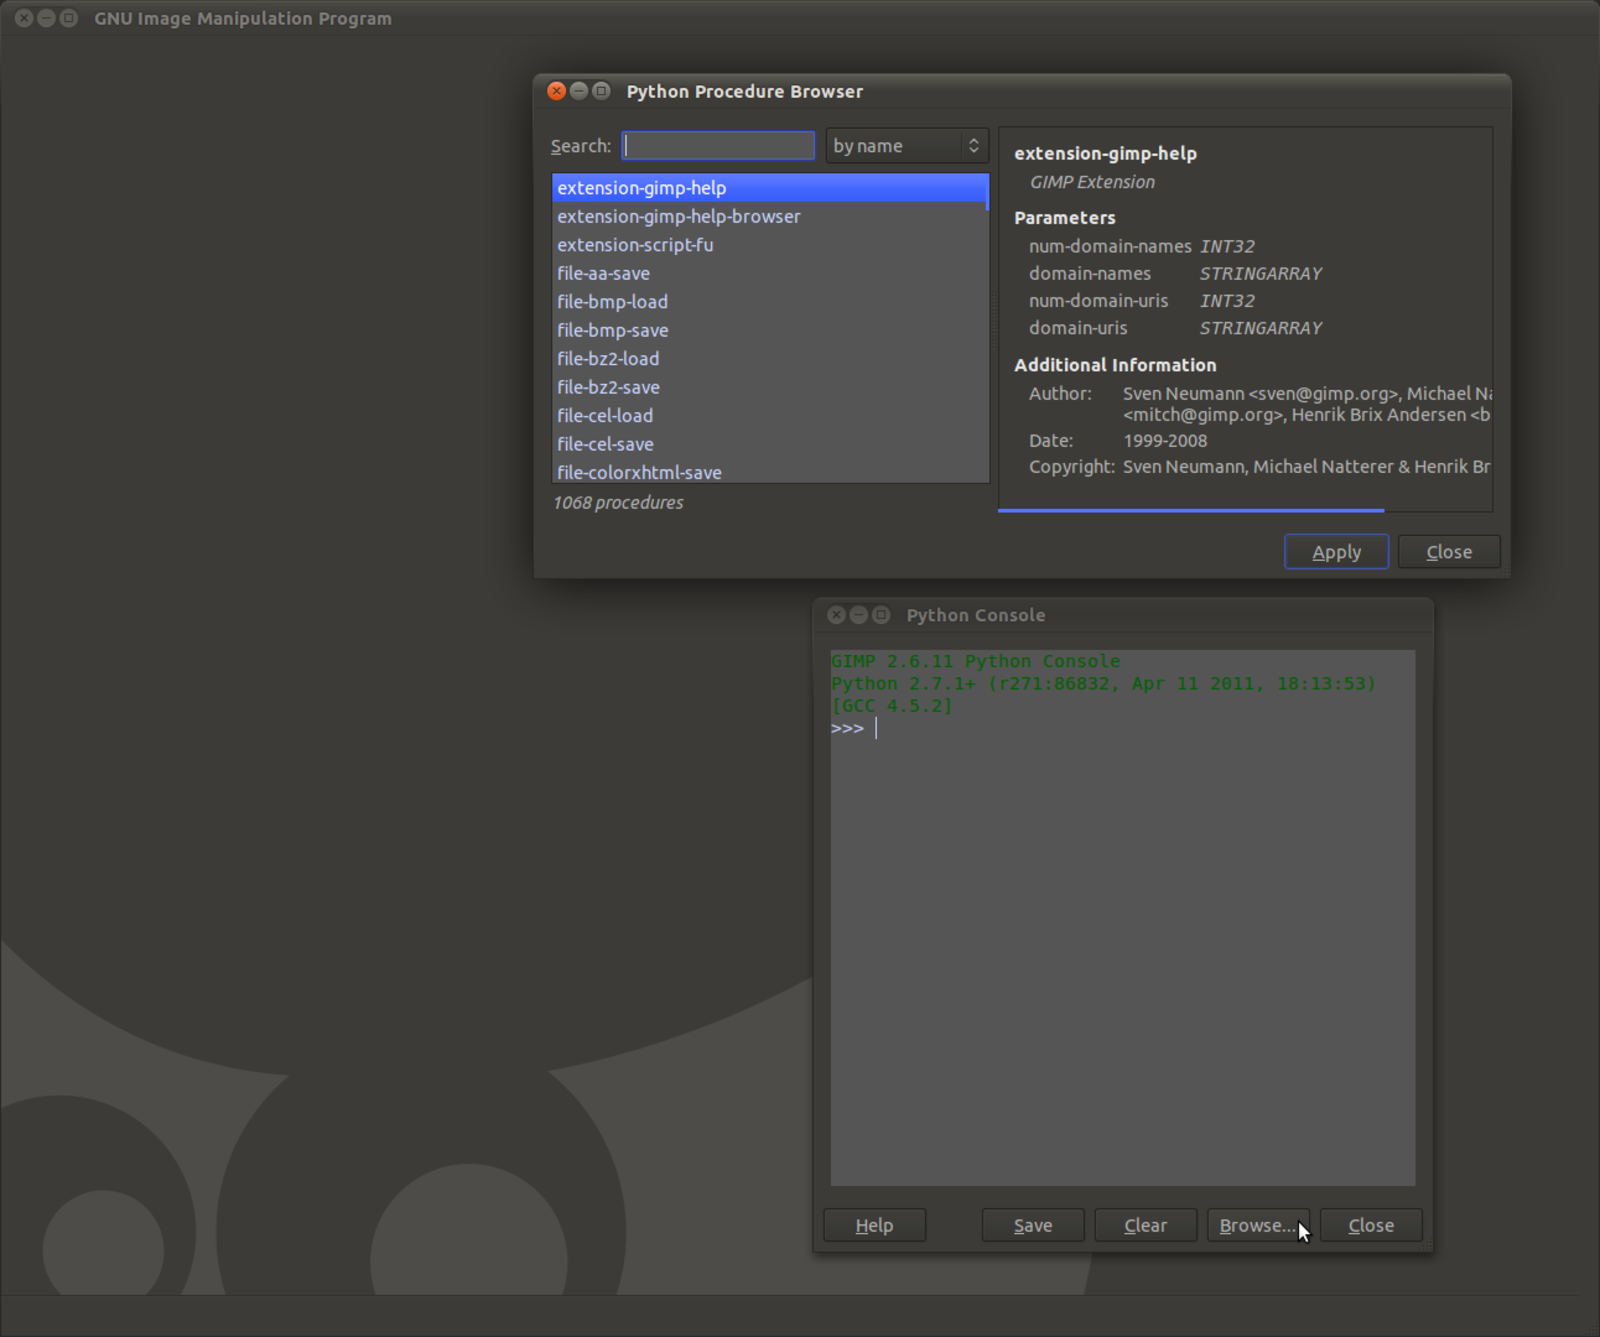
Using the filterbox at the top, you can easily find the python function that matches the action you would normally execute using The Gimp’s menus (such as a layer resize, or filter).
When you select the function, it will show you a basic man page on what it does and the parameters it takes, and applying this function will insert the code into the console with place holders for the parameters, which you can then simply modify and execute.
After getting the basics from Googling around, I made a basic script that I just copied and pasted into the console when I wanted to execute the repetitive actions.
I then optimised the script by wrapping it in a function, doing all my actions in a separate context (as not to disturb the users context for things like selected brush, etc.) and also group all my actions in a single undo (to simplify the history and make it easy to undo what my script does).
Work-arounds:
There are a couple of hacks in the script that I couldn’t work out the nice way around in a short period of time (I’m still a n00b).
Rather than working out how to fix it, I thought I would just describe them here.
One of those being that to add a white border around a layer, I need to resize the layer with an offset, and this new extra space would not always be white (regardless of my selected background color). My work around was to add a white layer behind it and merge it down.
The other hack was with stoking. To add a 1px black stroke around a layer, I normally just specify 1px black from the stroke dialogue (as opposed to using the selected brush). I could not find an equivalent to this in the Python API - it always used the selected brush.
As the default brushes include a 1px brush (and a 3px brush, but no 2px brush) I thought I’d use that, but to do a stroke around the outside of a layer, I needed to select-all, then stoke, but with a 1px brush, I could not specify I wanted that 1px to be on the inside of the selection. So stroking with this method put the line on the top and left sides, not on the bottom and right.
The hack I used here is to rotate 180 degrees, stroke and repeat.
Not the most elegant of scripts, but this was my first attempt and got the job done.
Registering the script with The Gimp:
So now that the script was working (albeit with work arounds) and I added the polish (function definition, separate context, grouped undo, etc.) I was ready to add it to the menus just like any other filter.
I used an existing script (located in ~/.gimp-2.6/plug-ins/) as a baseline and adjusted it for my new script (that I called “photofy”).
This part of the code allows you to specify the name of the script, where in the menu it should be registered and if there are any user-specified inputs to the script you can even specify a simple GUI for a dialogue box to get them from the user - which I did to collect the desired size of the white margin.
You can see this part of the code at the bottom of the python script.
Demo:
So now the fun part, this is how you use it :)
Here is a simple image with 2 layers: a white background layer and a smaller subject layer (the gradient).

With the subject layer selected, navigate to the menu in which the “Photofy” script is registered.

The dialogue box that I specified in the script-fu code segment at the bottom of the script will appear and allow the user to enter the size of the white margin.

When you press “OK”, the script will run through its actions and the user’s environment will remain the same, and the there will be a single new undo step in the history.
This is the final product:

The code:
If you’re interested in seeing what the code looks like, or want to use the script yourself (either as is, or as a baseline to write you own), it is available here:
https://github.com/stevenocchipinti/Gimp-Python-Fu/blob/master/photofy.py